数字孪生

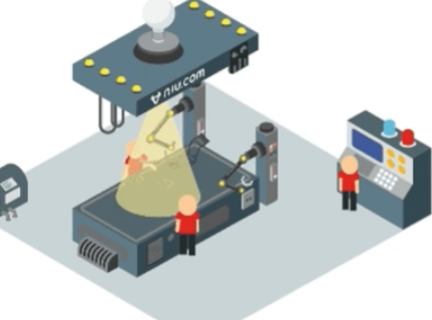
利用物理模型、传感器数据、历史数据等在虚拟空间中完成映射,反映相对应实体装备的全生命周期过程。

1、开发工具.NET或者Unity

  • Windows 使用WPF (windows Present Framework)
  • macOS/linux使用maui (multi platform application UI)是WPF的扩展
  • 安装maui
    • dotnet workload install maui

2、通信仿真

3、创建项目

  • 创建解决方案(一个解决方案下可以有多个项目)

dotnet new sln -n 解决方案名

  • 创建maui项目

dotnet new maui -n 项目名

  • 配置task.json和launch.json 配置时参考命令

  • task.json

1
2
3
4
5
6
7
8
9
10
11
12
13
14
15
16
17
18
19
20
21
22
23
24
25
26
27
28
29
30
31
32
33
34
35
36
37
38
39
40
41
42
43
44
45
46
47
48
49
50
51
52
53
54
{
"version": "2.0.0",
"tasks": [
{
"label": "build maui-ios",
"command": "dotnet",
"type": "shell",
"args": [
"build",
"-t:Build",//target
// "-p:Configuration=Debug",//Property
"-c", "Debug",//configuration 和上边的等价
"-f", "net10.0-ios", //framework
"-r", "iossimulator-arm64",//runtime 运行时架构,ios模拟器设备
// "--runtime", "ios-arm64",
// "-p:MauiTargetProject=${workspaceFolder}/FirstProject/FirstProject.csproj", //项目配置文件,指定 MAUI 目标项目文件路径
// "-p:XamlTools=/Users/liuchuanxi/.vscode/extensions/ms-dotnettools.csharp-2.110.4-darwin-arm64/.xamlTools",//指定 C# 扩展提供的 XAML 工具路径
// "-p:EnableDiagnostics=True", //启用诊断功能
// "-p:EnableMauiXamlDiagnostics=True",
"${workspaceFolder}/FirstProject/FirstProject.csproj"//要构建的项目文件完整路径
],
"problemMatcher": "$msCompile"
},
{
"label": "build maui-mac",
"command": "dotnet",
"type": "shell",
"args": [
"build",
"-t:Build",//target
// "-p:Configuration=Debug",//Property
"-c", "Debug",//configuration 和上边的等价
"-f", "net10.0-maccatalyst", //framework
"-r", "maccatalyst-arm64",//runtime 运行时架构
// "-p:MauiTargetProject=${workspaceFolder}/FirstProject/FirstProject.csproj", //项目配置文件,指定 MAUI 目标项目文件路径
// "-p:XamlTools=/Users/liuchuanxi/.vscode/extensions/ms-dotnettools.csharp-2.110.4-darwin-arm64/.xamlTools",//指定 C# 扩展提供的 XAML 工具路径
// "-p:EnableDiagnostics=True", //启用诊断功能
// "-p:EnableMauiXamlDiagnostics=True",
"${workspaceFolder}/FirstProject/FirstProject.csproj"//要构建的项目文件完整路径
],
"problemMatcher": "$msCompile"
},
// {
// "label": "build Lesson-snl",
// "command": "dotnet",
// "type": "shell",
// "args": [
// "build",
// "${workspaceRoot}/CSharp-Lesson.slnx"
// ],
// "problemMatcher": "$msCompile"
// }
]
}
  • launch.json
1
2
3
4
5
6
7
8
9
10
11
12
13
14
15
16
17
18
19
20
21
22
23
24
25
26
27
28
29
30
31
32
33
34
35
36
37
38
39
40
41
42
43
44
45
46
47
48
49
50
51
52
53
54
55
56
57
58
59
60
61
62
63
64
65
66
{
// 使用 IntelliSense 了解相关属性。
// 悬停以查看现有属性的描述。
// 欲了解更多信息,请访问: https://go.microsoft.com/fwlink/?linkid=830387
"version": "0.2.0",
"configurations": [
{
"name": "Run iOS Simulator",
"type": "coreclr",
"request": "launch",
"preLaunchTask": "build maui-ios",
"program": "dotnet",
"args": [
"build",
"-t:run", //运行,需要提前构建项目
// "--project",
// "${workspaceFolder}/FirstProject/FirstProject.csproj", //不使用--project开关
"--framework",
"net10.0-ios",
// "-p:RuntimeIdentifier=ios-arm64",
"-r", "iossimulator-arm64",//此处要和task构建的运行时架构一致否则报错
"-p:_DeviceName=:v2:udid=6E2F2C58-D041-4097-BF2E-791E169DC1B9"//模拟器udid, 通过xcode->windows->simulor查udid
],
"cwd": "${workspaceFolder}",
"console": "integratedTerminal"
},
{
"name": "Run Mac Catalyst",
"type": "coreclr",
"request": "launch",
"preLaunchTask": "build maui-mac",
"program": "dotnet",
"args": [
"run", //一键式构建+运行
"--project",
"${workspaceFolder}/FirstProject/FirstProject.csproj",
"--framework",
"net10.0-maccatalyst",
"--runtime",
"maccatalyst-arm64"
],
"cwd": "${workspaceFolder}",
"console": "integratedTerminal"
}
// {
// "name": "iOS Simulator",
// "type": "dotnet-maui",
// "request": "launch",
// "project": "${workspaceFolder}/FirstProject/FirstProject.csproj",
// "target": "ios-simulator",
// "framework": "net10.0-ios",
// "runtimeIdentifier": "iossimulator-arm64",
// "preLaunchTask": "build maui-ios"
// },
// {
// "name": "Mac Catalyst",
// "type": "dotnet-maui",
// "request": "launch",
// "project": "${workspaceFolder}/FirstProject/FirstProject.csproj",
// "target": "maccatalyst",
// "framework": "net10.0-maccatalyst",
// "runtimeIdentifier": "maccatalyst-arm64",
// "preLaunchTask": "build maui-mac"
// }
]
}
  • 常用命令

    1
    2
    3
    4
    5
    6
    dotnet workload install <工作负荷> --version 10.0.1 #安装平台应用
    dotnet workload uninstall <工作负荷> #卸载平台应用
    dotnet workload search #查询可用平台应用
    dotnet workload list #已安装的平台
    dotnet --info #dotnet信息
    dotnet new globaljson --sdk-version 10.0.100 --force #切换dotnet版本

4、vscode创建项目

5、(1)创建项目时要联网,否则一些依赖配置无法下载

​ (2)运行环境macos系统是15+,.Net10+, Xcode 26+

​ (3) 各类型项目(例如maui)sdk的版本要和dotnet sdk版本一致否则报错

​ (4)MAUI 采用‌原生控件渲染‌,直接利用平台特定的 UI 组件(如 Android 的 Android.Views 或 iOS 的 UIKit),从而实现接近原生的性能和外观,但需为每个平台编写或适配特定代码;而 MAUI Blazor 将 Blazor(一种基于 Web 技术的框架)集成到 MAUI 中,使用‌HTML/CSS/JavaScript 渲染 UI‌,通过 WebView 在原生外壳中显示内容,使 UI 保持跨平台一致性,但可能引入 Web 技术的性能开销。‌

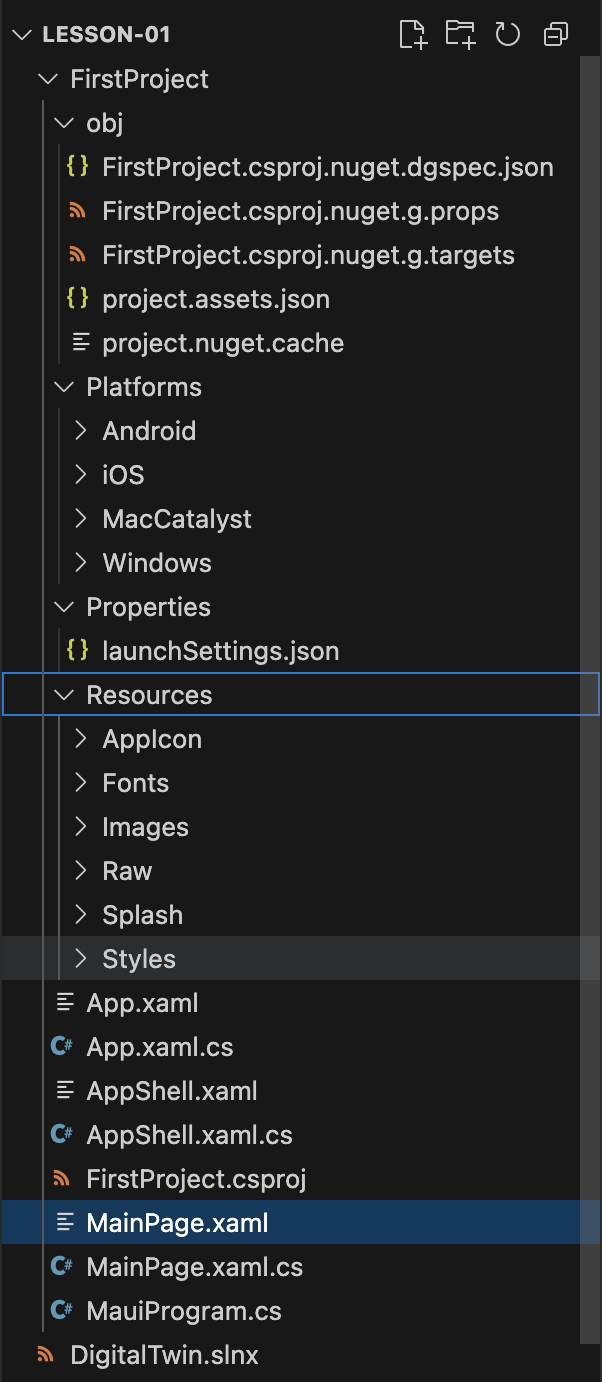
工程项目讲解

image-20260109165230285
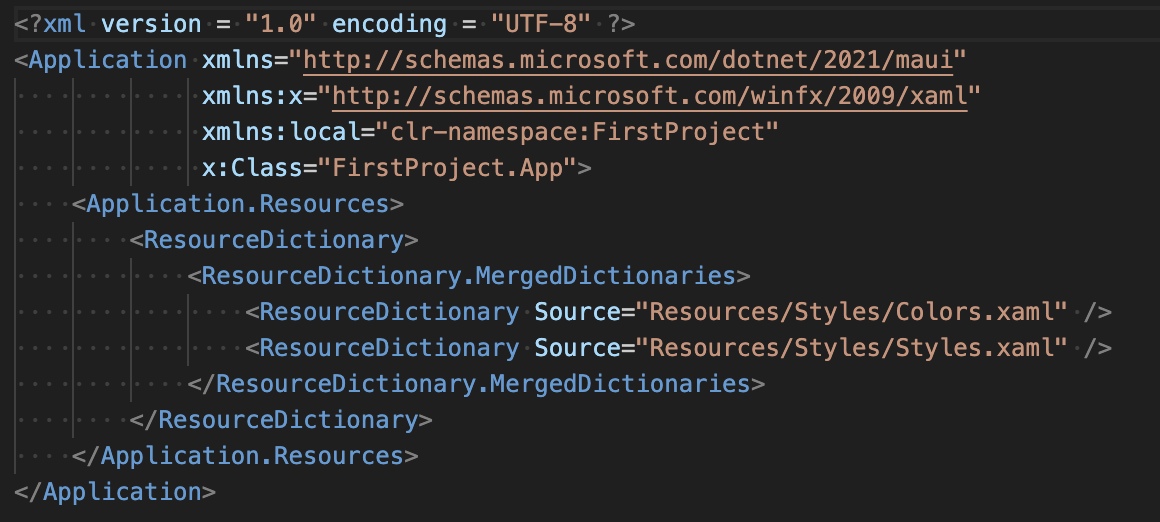
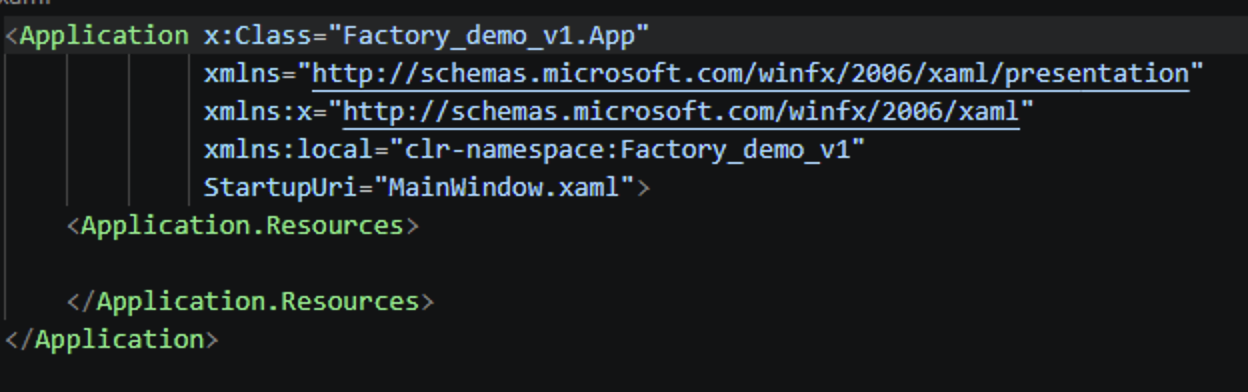
  • App.xaml

    image-20260109165504581

  • MainPage.xaml主窗口

3D空间

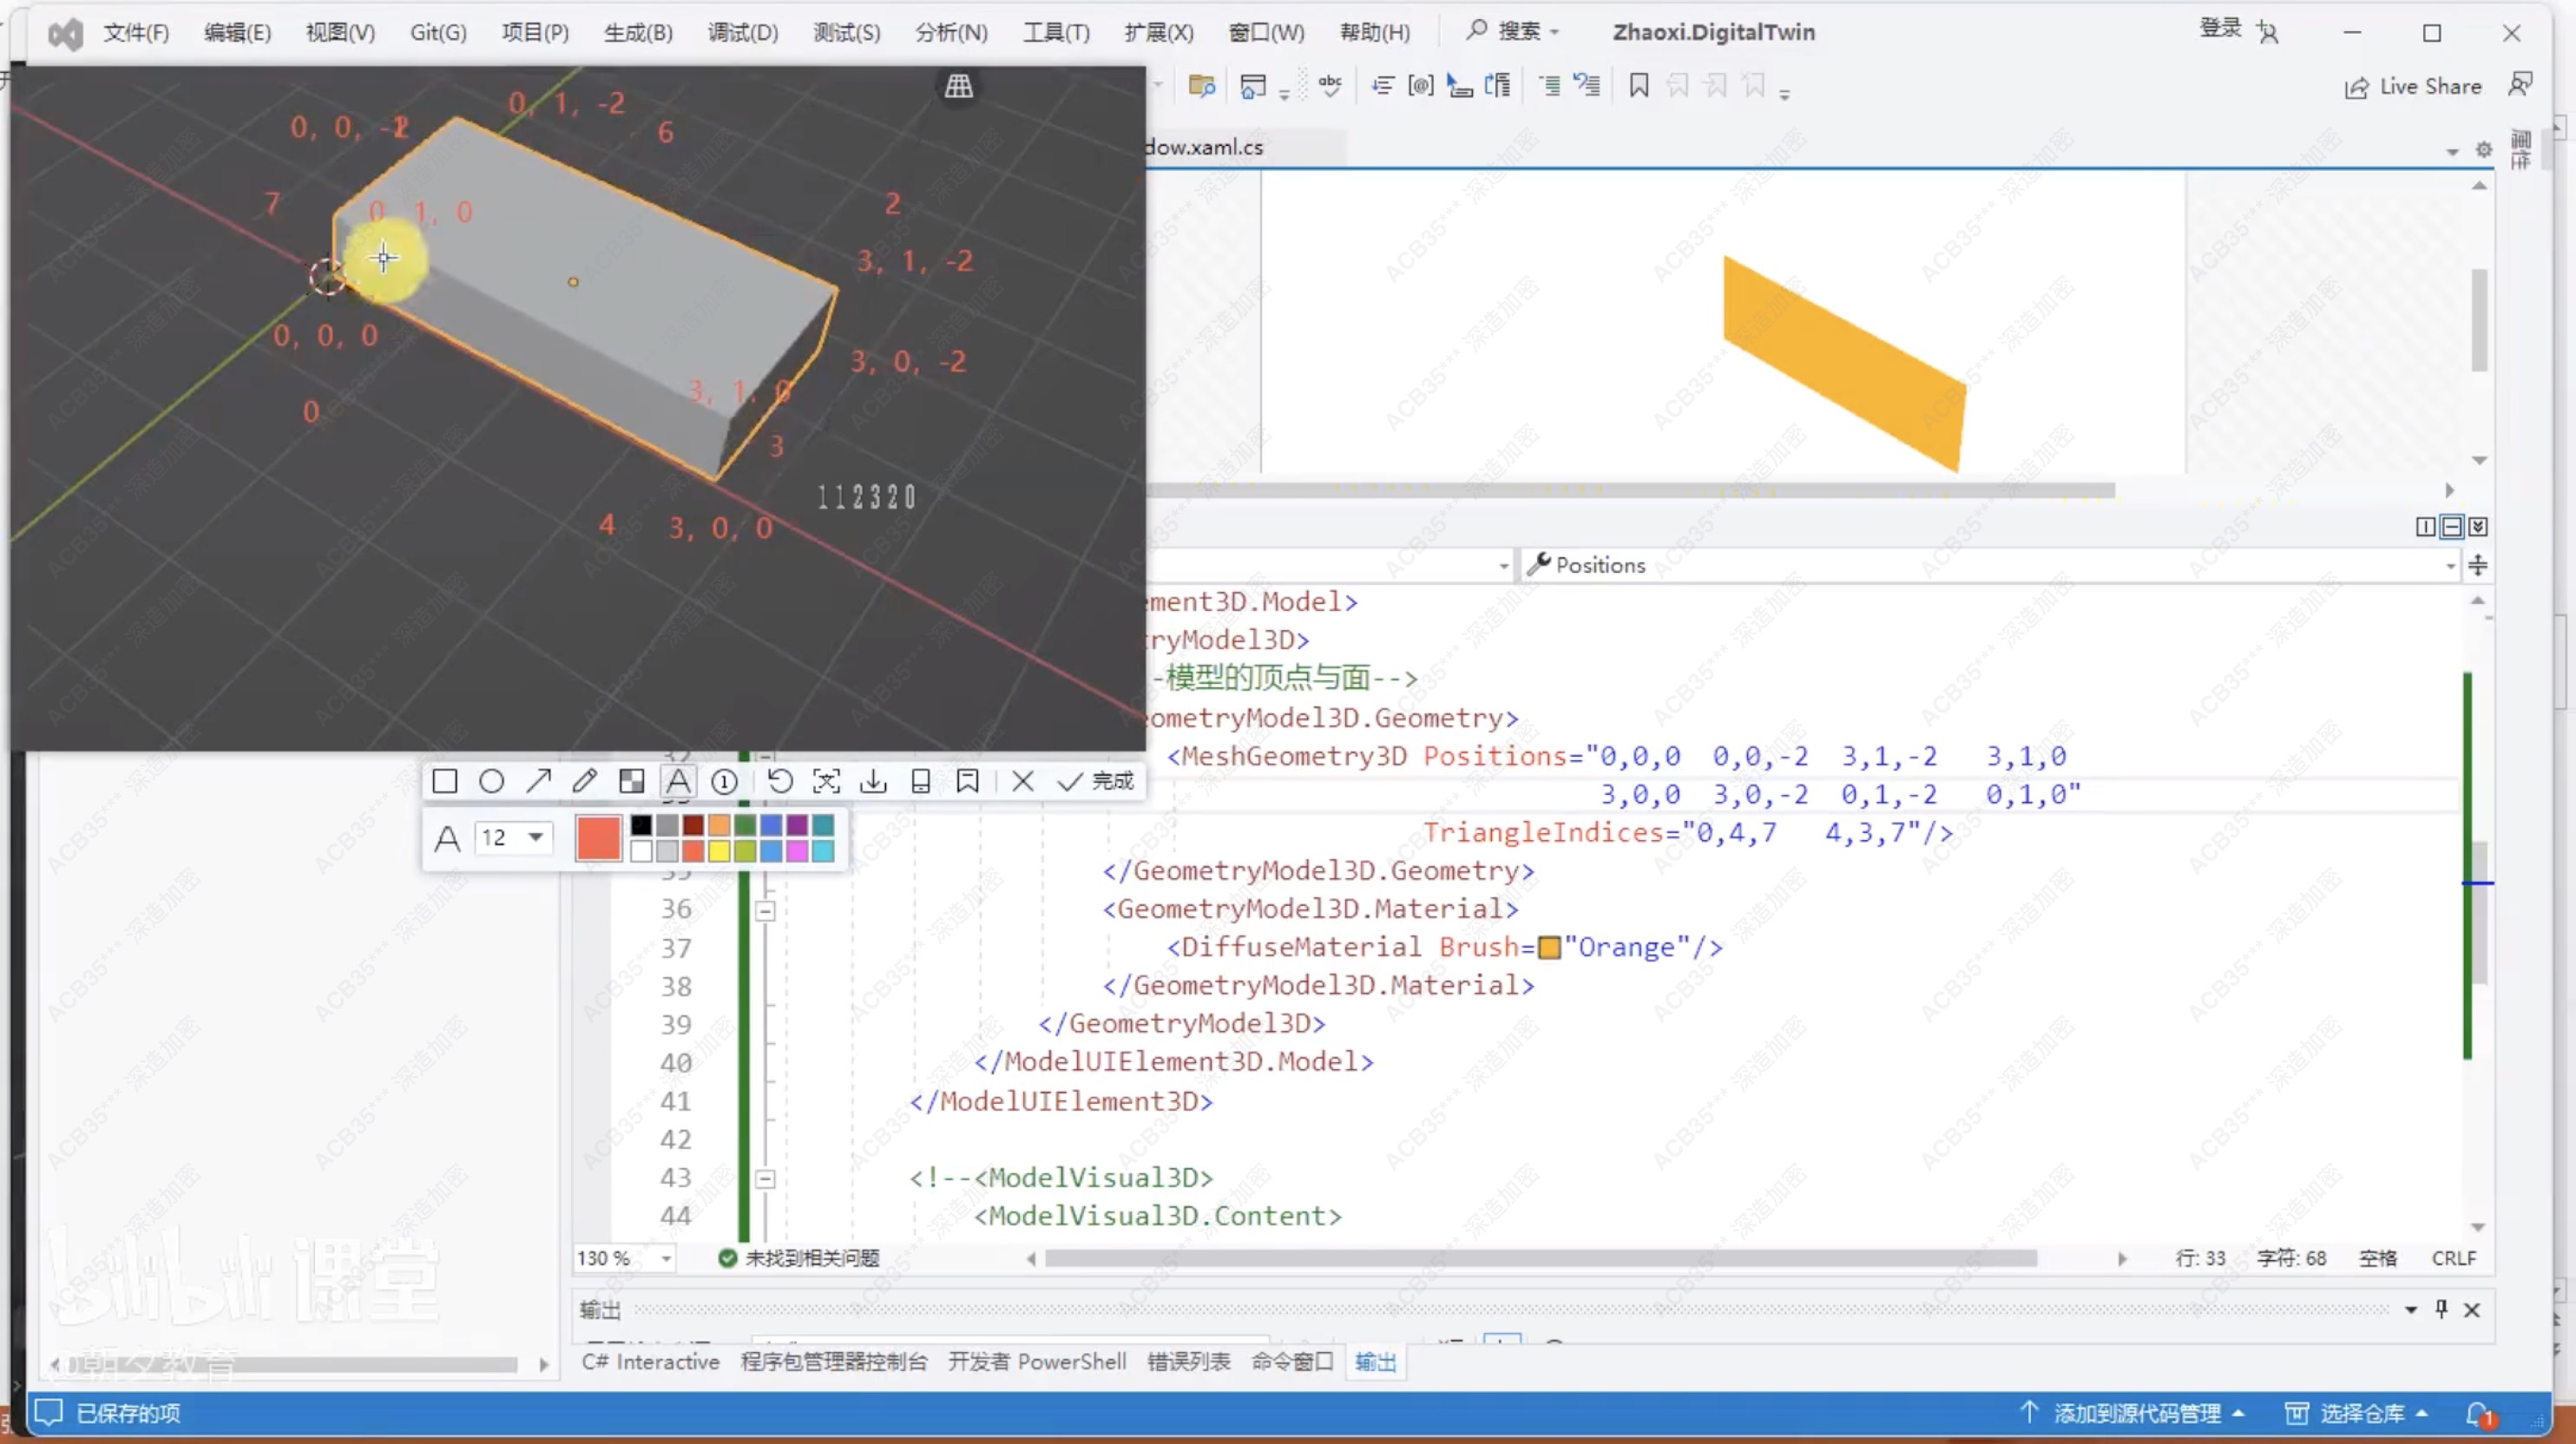
  • 概念:坐标系,点线面,三角顶点网格,材质(贴图),光源,相机
  • 模型结构:MeshGemetry3D, Positions, TriangleIndices, Material
  • 相机:透视相机、正交相机
  • 光源:环境光、平行光、点光源、聚光灯
  • 对象容器:ViewPort3D

Unity数字孪生

数字孪生:数字化方式拷贝工厂的物理对象,模拟对象在现实场景中的行为,提高研发效率提前预判错误可能,节约生产成本。

  • 设备同步:以生产线为基础搭建一套虚拟生产线,对生产线上的设备3D建模并放置到虚拟场景中,实现真实和虚拟生产线一一对应
  • 数据同步:生产线设备通过PLC驱动实现既定动作,采集PLC数据驱动虚拟环境下设备模型实现同样既定动作,实现真实和虚拟设备实时联动

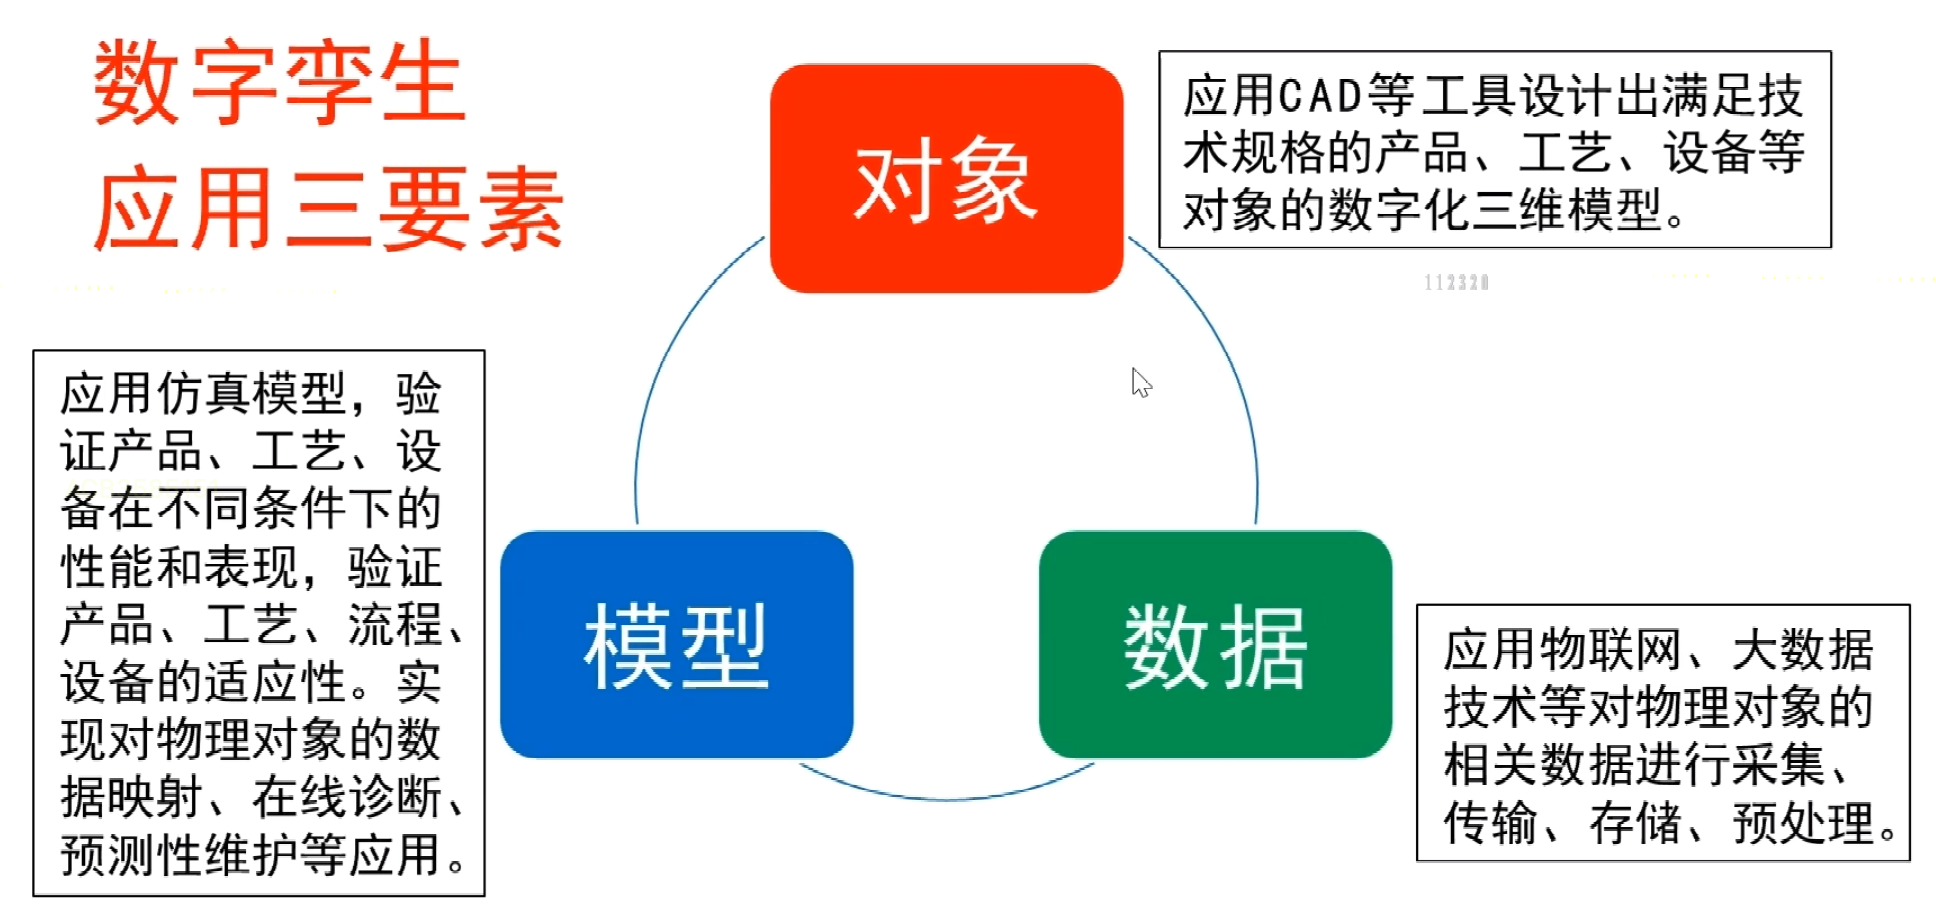
数字孪生需要哪些技术

  1. 建模:物理世界模型化
    • 几何模型(壳子)
    • 本构关系模型,物理规律
    • 流程模型
    • 逻辑模型
  2. 物联网技术:将离线模型与真实数据连接,将真实的设备状态上传到模型,操作模型的指令下达到真实设备
  3. 仿真模拟(核心):建模和仿真是一对孪生体,建模是对物理世界的理解,仿真则是模型验证理解的内容是否符合物理世界,对已有规律的理解
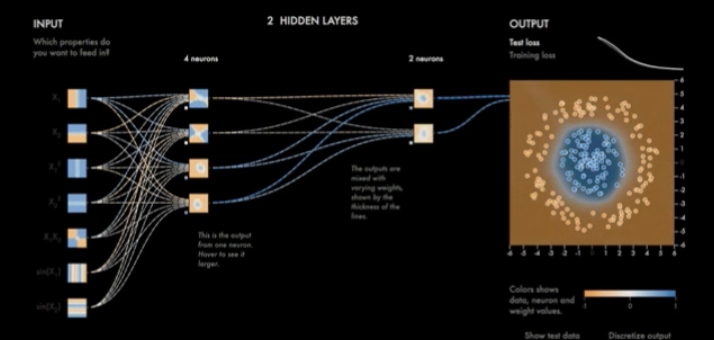
  4. 机器学习:对未知规律的预测
  5. 云计算、大数据、多源数据融合

数字孪生软件介绍

  • 数字孪生~={green}平台=~软件: 解决数字孤岛问题,通过统一数据源来实现,数据格式是什么实现数据互通
    *
  • 数字孪生~={green}建模=~软件:在计算机上更加直观的了解我们的模拟对象
    • 三维GIS(Esri,Skyline)
  • 数字孪生~={green}仿真=~软件:将确定的规律和完整的机理转化成软件的方式来模拟物理世界

vscode .NET环境

  1. 安装:.NET Core SDK, .NET Core Runtime, Visual Studio Code, C# for Visual Studio Code
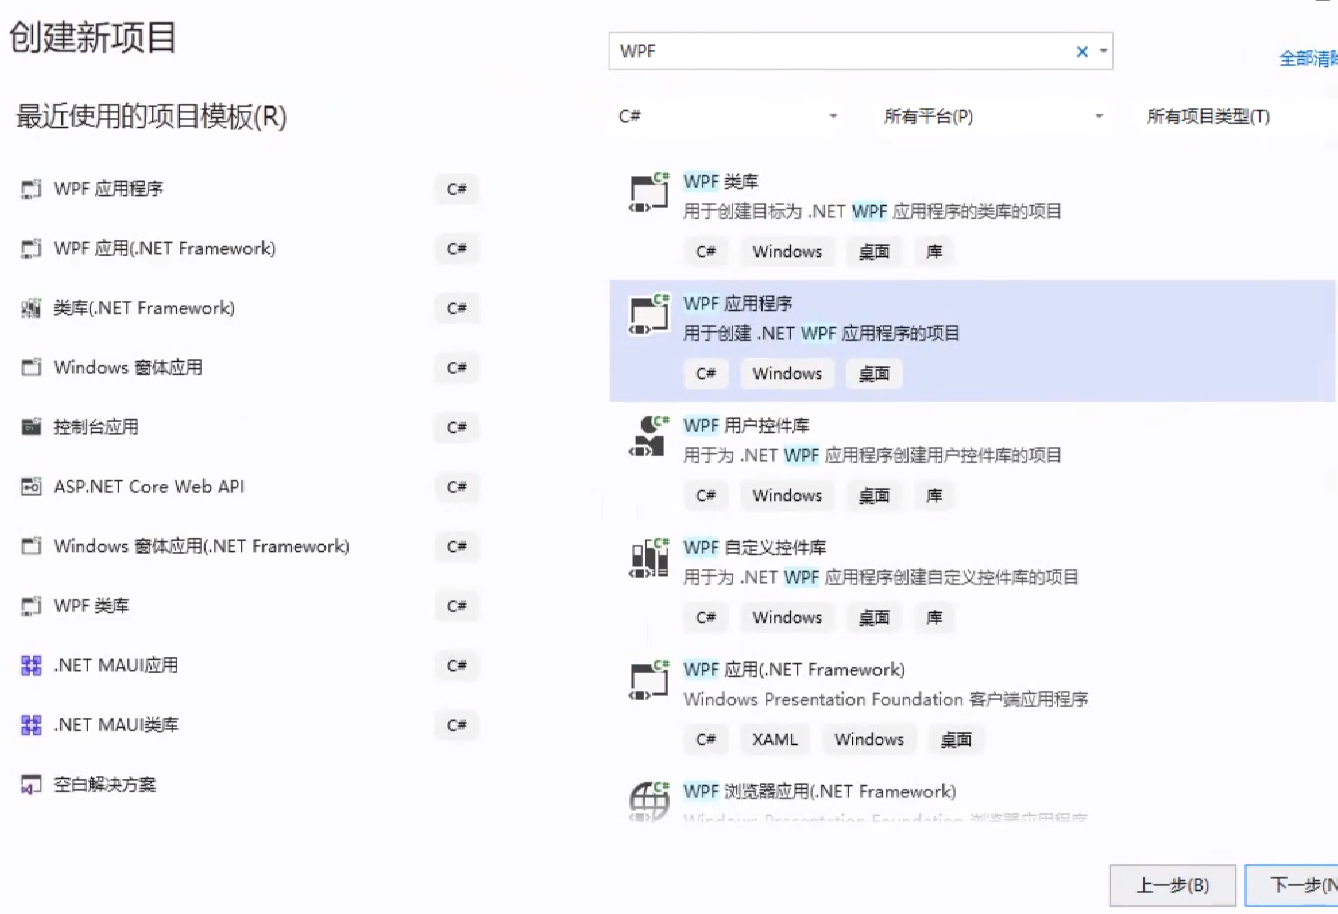
  2. 安装WPF项目模版:dotnet new install Microsoft.DotNet.Wpf.ProjectTemplates
  3. 创建WPF项目:dotnet new wpf -n <ProjectName>
  4. VScode打开WPF项目
  5. 运行项目:dotnet run
  6. C#和XAML开发
    技术要点:
  • WPF布局(只能在windows中)
  • 界面处理
  • 图表控件
  • 3D模型
  • 3D交互:告警
  • 设备通信:数据和控制命令

创建项目

  • visual studio WPF应用程序对应.NET Core, 项目名、解决方案名
  • 入口程序App.xaml中StartupUri="MainWindow.xaml"指向资源MainWindow.xaml

WPF框架3D支持

  • 坐标系、点线面、三角顶点网格、材质、光源、相机
  • 模型结构:MeshGeometry3D, Positions, TriangleIndices, Material
  • 相机:环境光、平行光、点光源、聚光灯
  • 对象容器:ViewPort3D:放置3D对象,是所有对象的根结点,放所有模型、相机、光源等对象
    MainWindow.xaml文件
1
2
3
4
5
6
7
8
9
10
11
12
13
14
15
16
17
18
19
20
21
22
23
24
25
26
27
28
29
30
31
32
33
34
35
36
37
38
39
40
41
42
43
44
45
46
47
48
49
50
51
52
53
54
55
56
57
58
59
60
61
62
63
64
65
66
67
68
69
70
71
72
73
74
75
76
77
78
79
80
81
82
83
84
85
86
87
88
89
90
91
92
93
94
95
96
97
98
99
100
101
102
103
104
105
106
107
108
109
110
111
112
113
114
115
116
117
118
119
120
121
122
123
124
125
126
127
128
129
130
131
132
133
134
135
136
137
138
139
140
141
142
143
144
145
146
147
148
149
150
151
152
153
154
155
156
157
158
159
160
161
162
163
164
165
166
167
<Window x:Class="Factory_demo_v1.MainWindow"

        xmlns="http://schemas.microsoft.com/winfx/2006/xaml/presentation"

        xmlns:x="http://schemas.microsoft.com/winfx/2006/xaml"

        xmlns:d="http://schemas.microsoft.com/expression/blend/2008"

        xmlns:mc="http://schemas.openxmlformats.org/markup-compatibility/2006"

        xmlns:local="clr-namespace:Factory_demo_v1"

        mc:Ignorable="d"

        Title="MainWindow" Height="450" Width="800">

    <Viewport3D>

        <!--相机观察-->

        <Viewport3D.Camera>

            <!-- 相机坐标、朝向、相机开关方向 视场大小 -->

            <PerspectiveCamera Position="10,10,10" LookDirection="-10,-10,-10" FieldOfView="30"/>

        </Viewport3D.Camera>

        <!-- 当前是黑色因为没有光源 -->

        <!--模型-->

        <ModelUIElement3D>

            <ModelUIElement3D.Model>

                <GeometryModel3D>

                    <!-- 模型顶点与面 -->

                    <GeometryModel3D.Geometry>

                        <!-- Positions几何顶点,TriangleIndices几何上显示的三角面 -->

                        <MeshGeometry3D

                            Positions="

                               0,0,0 0,0,-2 3,1,-2 3,1,0

                                3,0,0 3,0,-2 0,1,-2 0,1,0

                            "

                            TriangleIndices="

                                0,4,7 4,3,7

                                7,3,6 6,3,2

                            "  

                        />  

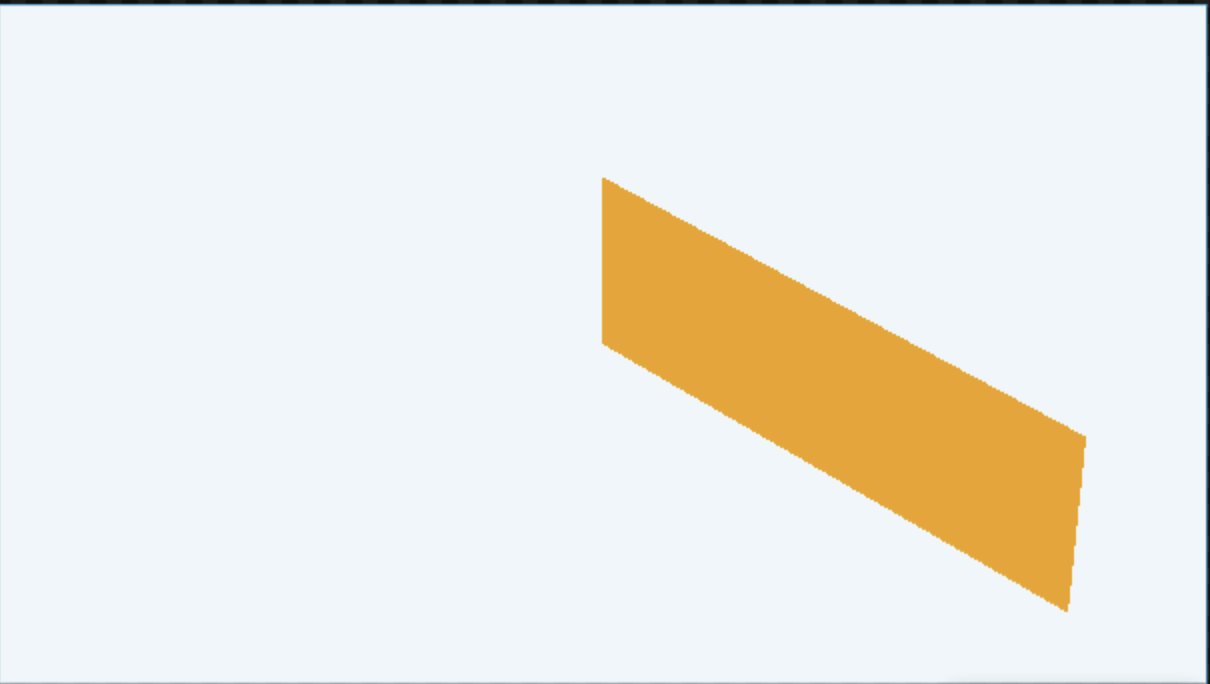
                        <!-- 三角面中顶点顺序决定方向 当前看不到几何 -->

                    </GeometryModel3D.Geometry>

                    <!-- 表面材质 -->

                    <GeometryModel3D.Material>

                        <DiffuseMaterial Brush="Orange"/>

                    </GeometryModel3D.Material>

                </GeometryModel3D>

            </ModelUIElement3D.Model>

        </ModelUIElement3D>


        <!--不同模型才能设置不同颜色-->

        <ModelUIElement3D>

            <ModelUIElement3D.Model>

                <GeometryModel3D>

                    <!-- 模型顶点与面 -->

                    <GeometryModel3D.Geometry>

                        <!-- Positions几何顶点,TriangleIndices几何上显示的三角面 -->

                        <!--(x右下【左右】,y上[上下],z左下【前后】)-->

                        <MeshGeometry3D

                            Positions="

                               0,0,0 0,0,-2 3,1,-2 3,1,0

                                3,0,0 3,0,-2 0,1,-2 0,1,0

                            "

                            TriangleIndices="

                                3,4,2 2,4,5


                            "  

                        />  

                        <!-- 三角面中顶点顺序决定方向 当前看不到几何 -->

                    </GeometryModel3D.Geometry>

                    <!-- 表面材质 -->

                    <GeometryModel3D.Material>

                        <DiffuseMaterial Brush="Green"/>

                    </GeometryModel3D.Material>

                </GeometryModel3D>

            </ModelUIElement3D.Model>

        </ModelUIElement3D>

        <!-- <ModelVisual3D>

            <ModelVisual3D.Content>

                <GeometryModel3D>

                </GeometryModel3D>

            </ModelVisual3D.Content>

        </ModelVisual3D> -->

        <!--光源-->

        <ModelVisual3D>

            <ModelVisual3D.Content>

                <AmbientLight Color="White"/>

            </ModelVisual3D.Content>

        </ModelVisual3D>


    </Viewport3D>

</Window>

423384

复杂模型搭建过程

  • 方法一:使用C#代码来计算出规则的表面点位置,以及组织面域
  • 方法二:使用专业建模工具,比如SolidWorks,3DMax,Blender,UE,AutoCAD等等,建模后导出特定格式,再将这特定格式的模型加载到WPF程序里

C#代码

partial 的作用是:允许同一个类 MainWindow 的代码分散写在多个文件中,编译时再合并成一个完整的类。
你的 MainWindow 实际上由两部分组成: 1) 自己写的 MainWindow.xaml.cs;2)MainWindow.xaml,WPF 会根据 XAML 自动生成另一部分 MainWindow
InitializeComponent()加载并初始化 MainWindow.xaml 中定义的界面,把 XAML 中的控件真正创建出来,并与 MainWindow.xaml.cs 连接起来。
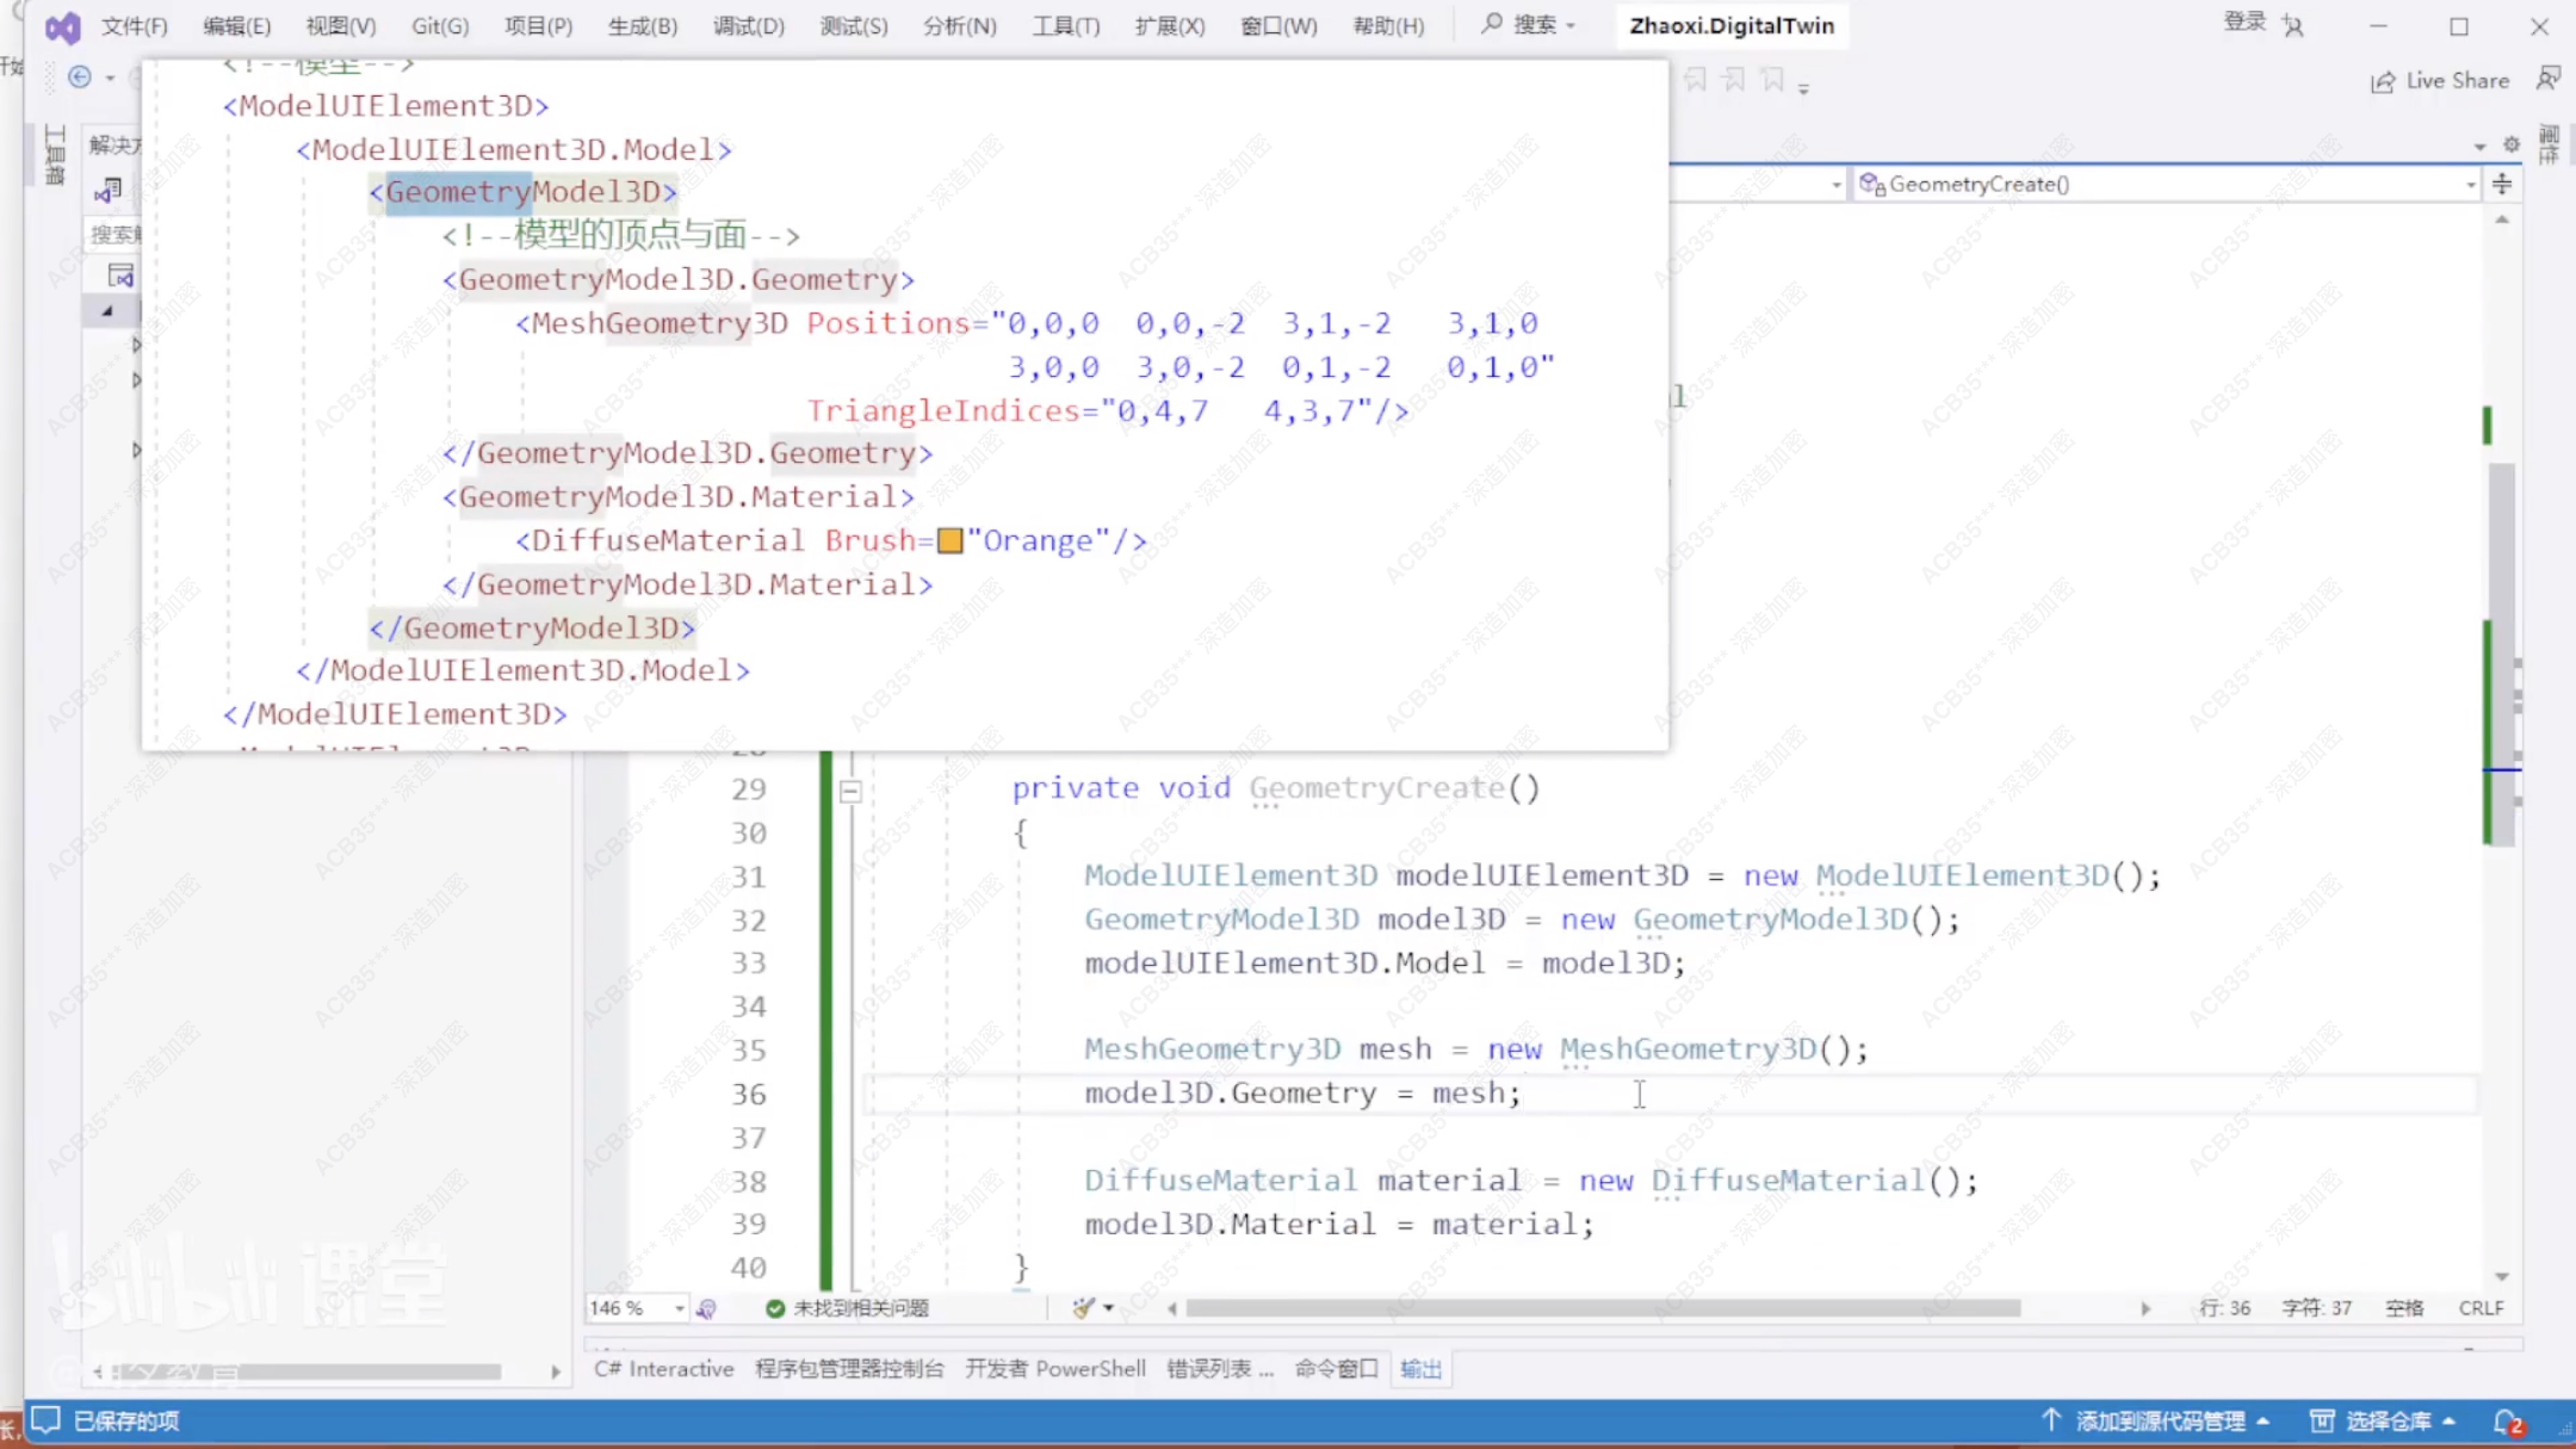

仿照xaml的标签写C#代码,每个标签对应一个类,标签属性对应该类下的属性

1
2
3
4
5
6
7
8
9
10
11
12
13
14
15
16
17
18
19
20
21
22
23
24
25
26
27
28
29
30
31
32
33
34
35
36
37
38
39
40
41
42
43
44
45
46
47
48
49
50
51
52
53
54
55
56
57
58
59
60
61
62
63
64
65
66
67
using System.Text;

using System.Windows;

using System.Windows.Controls;

using System.Windows.Data;

using System.Windows.Documents;

using System.Windows.Input;

using System.Windows.Media;

using System.Windows.Media.Imaging;

using System.Windows.Media.Media3D;

using System.Windows.Navigation;

using System.Windows.Shapes;


namespace Factory_demo_v1;


/// <summary>

/// Interaction logic for MainWindow.xaml

/// </summary>

public partial class MainWindow : Window

{

    public MainWindow()

    {

        InitializeComponent();

    }

    private void GeometryCreate()

    {

        ModelUIElement3D modelUIElement3D = new ModelUIElement3D();

        GeometryModel3D model3D = new GeometryModel3D();

        modelUIElement3D.Model = model3D;

        MeshGeometry3D mesh = new MeshGeometry3D();

        model3D.Geometry = mesh;

        DiffuseMaterial material = new DiffuseMaterial();

        model3D.Material = material;

    }

}

Unreal Engine数字孪生